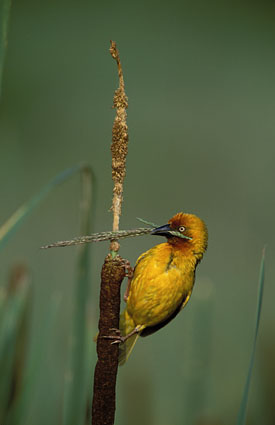
Getting Really Sharp
 Having invested in a good quality telephoto lens, you have just returned from the first trip using the new equipment and are eagerly reviewing the results. However, apart from a few 'good uns', most of the pictures are rather below the calendar quality you had anticipated. Somehow they lack the bite and crisp detail expected after parting with a great deal of hard earned cash for the lens. What went wrong?
Discovering why pictures are not sharp requires a bit of detective work using a process of elimination. Let's assume that the bird was not moving when the photograph was taken: that will rule out subject blur. You checked that the lens was correctly focussed just before you pressed the shutter button: that cannot be the problem. And yet the picture is still unsharp. The chances are that the problem is camera shake. Anyone who has used a powerful spotting telescope will know that the slightest movement or vibration is magnified into huge unsteadiness in the image you are looking at. Telephoto lenses do not magnify to the same degree as a spotting 'scope but even so, if the lens is not held absolutely steady, the slightest movement will result in unsharp pictures. I often see photographers with expensive telephoto lenses balancing them on car windows or, worse still, hand holding. When using the fine grained films of 100ASA or less, this will guarantee camera shake and unsharp pictures. A really steady camera support is absolutely essential for quality bird photography. For hide work, a sturdy tripod fits the bill. When buying a tripod it is a good idea to take your biggest lens along to the camera store. Try mounting the lens on the tripod and tap the lens firmly. If the lens vibrates for more than a split second, the tripod is not solid enough. But don't go in for tripod overkill! A huge tripod designed for movie work is very steady but will be a terribly heavy item to lug around in the field. I find the Benbo range of tripods (now being sold in South Africa) a good compromise. Although medium weight, they are steady enough to support a 600mm lens. Designed for nature photography, the bottom legs are sealed and thus waterproof and a special universal joint locking device makes this tripod easy to use on uneven ground. I like to do a lot of my photography at bird's eye level or below. Many tripods can not be set sufficiently low for this. A bean bag is ideal for really low angle photography. I have a standard size bean bag for lenses up to 400mm and also a monster bag filled with 10kg of dried mealies that easily supports a 600mm lens. Don't overfill a bean bag as the lens needs to fit snugly into it. Also, if you are flying to your photo destination and weight is a problem, you can take along an empty bag and fill it with sand or gravel when you arrive. Bean bags are also handy when photographing from a vehicle. Many photographers also make a platform that fits over the car door to firmly support the bean bag. However, when using a bean bag, it can be difficult to pan smoothly when following a moving subject. The best camera support in a vehicle is a frame of welded angle iron bolted to the car door. Mine is height adjustable in the form of a locking tube that firmly grips the central column of my tripod. I can appreciate though that not everyone will be prepared to drill holes in the door of the family vehicle just to ensure a steady camera support! There are several camera support brackets on the market that fit onto the car window but most are too flimsy to support a big telephoto lens. However, I was very excited to receive, just a few days ago, a sample of a new locally produced car bracket manufactured by Ron McKechnie of Klerksdorp. Ron's CamStedi Bracket is very sturdy, well designed and nicely finished and is the ideal option for photographers wanting a firm camera support in a vehicle without having to drill holes in the car door. As yet, Ron is not producing the bracket in commercial quantities but he told me he is prepared to supply to 'Africa Birds and Birding' readers. Anyone interested should contact him on (018) 85203 or write to PO Box 6390, Flamwood 2572. The most exciting light for photography is generally early morning or late in the day. This inevitably means slower shutter speeds and consequently greater risk of camera shake. Even when using a big, heavy tripod at these times, just the slightest vibration caused by pressing the shutter button can easily result in blurred pictures. In low light, 'hands off' photography is required and is facilitated by using a cable release. This simple inexpensive piece of equipment is probably the best investment you can make to ensure sharp bird pictures. I regularly use my 600mm lens at shutter speeds as low as 1/30th second. By using a cable release the results are often sharp enough for publication even in big, prestige calendars. Without the cable release I'm sure most of these pictures would have been assigned to the waste-paper bin on the first edit. Top | Previous | Next | Tips Home | Stock Images | Books | Tips | Gallery | FAQ's | Kruger Park | Contact Text and photographs © Nigel Dennis |